

Baseball Throwing Technique for Youth Players

Your child catches the ball, plants both feet, and fires it back with everything the shoulder can give. The throw sails past the cutoff player, and the next instruction from the sideline is to throw harder or keep the elbow up. Neither tells a developing player how to organize the movement.
Good baseball throwing technique starts with a different question: can your child step, turn, release, and finish in an order they can repeat comfortably? For youth players, an easy throw that reaches a partner is a better starting point than a fast throw nobody can catch.
Throw From the Ground Instead of the Arm
Say a young player at local-league practice keeps missing high. Their feet barely move, their chest faces the target from the start, and their throwing shoulder does most of the work. Asking for more effort usually produces a bigger version of the same miss.
Instead, have the child set up slightly sideways and make a comfortable step toward the partner. Let the body turn with the throw rather than leaving the feet behind.
Throwing is a timed whole-body sequence, not a collection of arm poses. A clinical commentary on the throwing kinetic chain emphasizes that the trunk and lower extremities affect upper-extremity stress, supporting instruction that looks beyond the shoulder and elbow.
Give the body a job before correcting the arm
The basic order is a balanced stance, a stride, lead-foot contact, hips opening ahead of the chest, arm acceleration, release toward the target, and a comfortable finish across the body.
That brief difference between hip and shoulder movement isn't a deliberate pause. Don't ask a child to twist hard and hold it. Think of the hips getting a small head start while the chest follows naturally.
This backyard setup keeps the attention on the child's movement rather than the ball's speed.
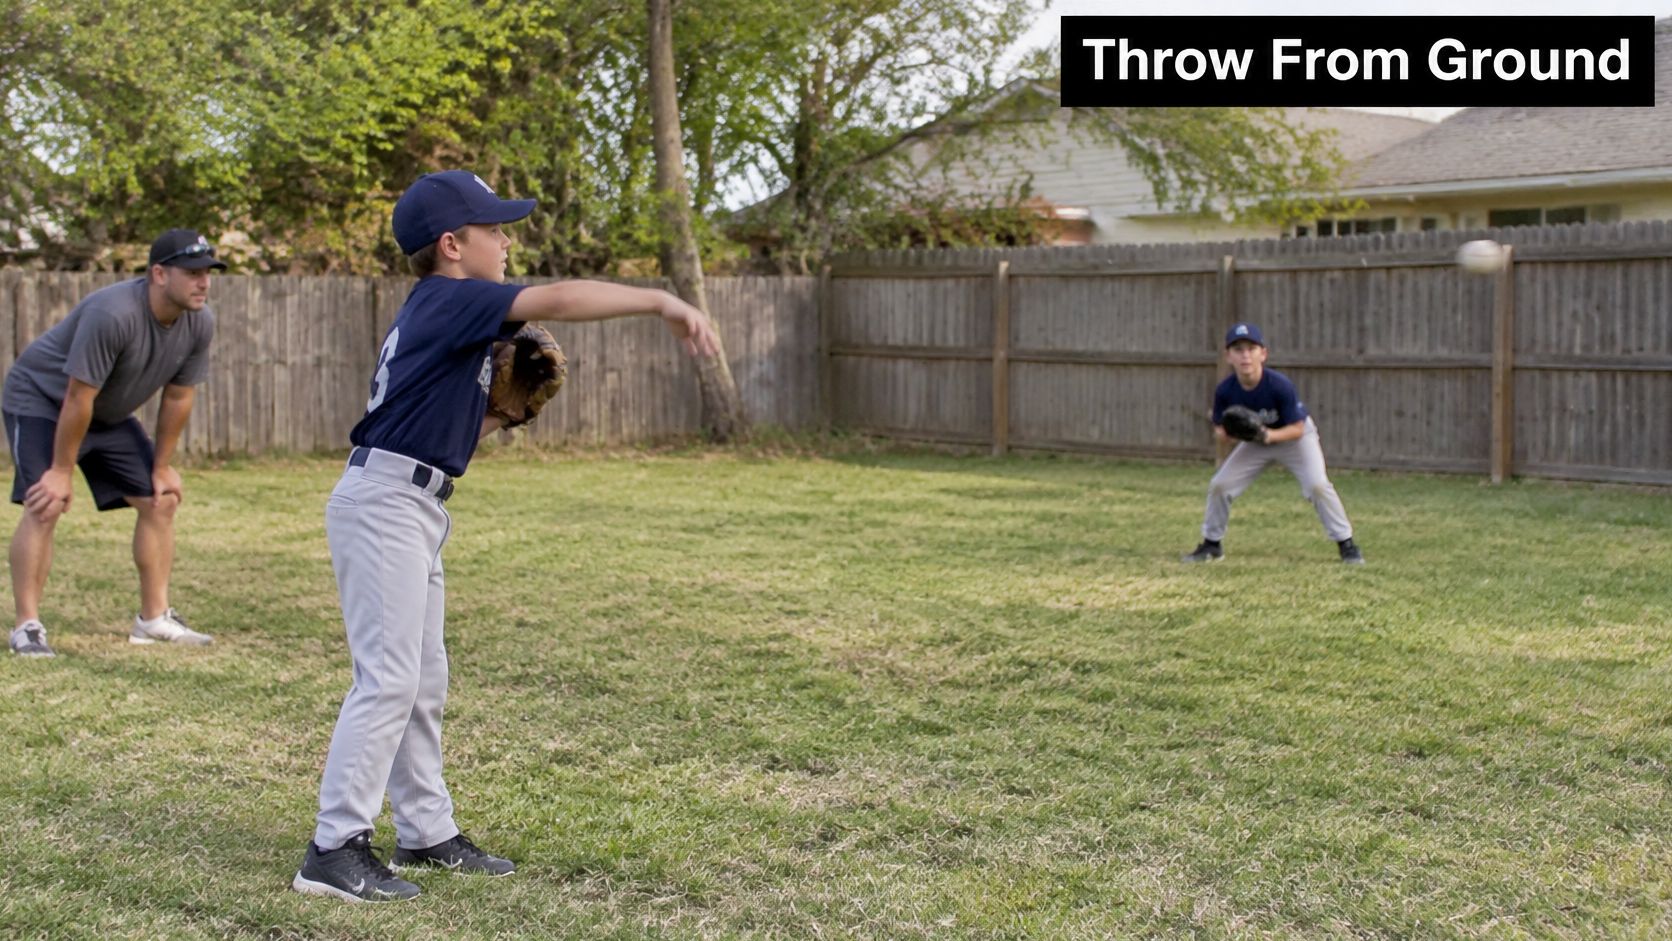
An isolated elbow instruction can distract a beginner from that sequence. A child may lift the arm into the requested position but still turn too early, rush the release, or lose balance.
No single perfect pose fits every child. Body size, confidence, coordination, and throwing experience all affect how the movement looks.
Starting standard: Look for a comfortable pattern your child can repeat at easy effort, not a still frame that resembles a professional pitcher.
For a parent, the useful checks are simple:
Watch the order. Does the child establish a base before accelerating the throw?
Watch the direction. Does the step help the ball travel toward the partner?
Watch the finish. Can the child complete the movement without stumbling or guarding the arm?
Before changing a cue, film a side-view throw with your phone. Stand outside the throwing lane, include the feet and throwing hand, and keep that clip as your starting reference.
Move Through the Six Phases in Order
The familiar overhand throw happens continuously, but naming its parts helps parents spot where a child gets rushed. The review of baseball pitching mechanics describes six phases: windup, stride, arm cocking, acceleration, deceleration, and follow-through, with front-foot contact occurring before maximum shoulder external rotation.
Use these phases as observation points, not positions to force. A fielding throw also doesn't require the full leg lift associated with pitching.
The visual below offers a simplified movement reminder. Its everyday action labels aren't identical to the formal phase names.
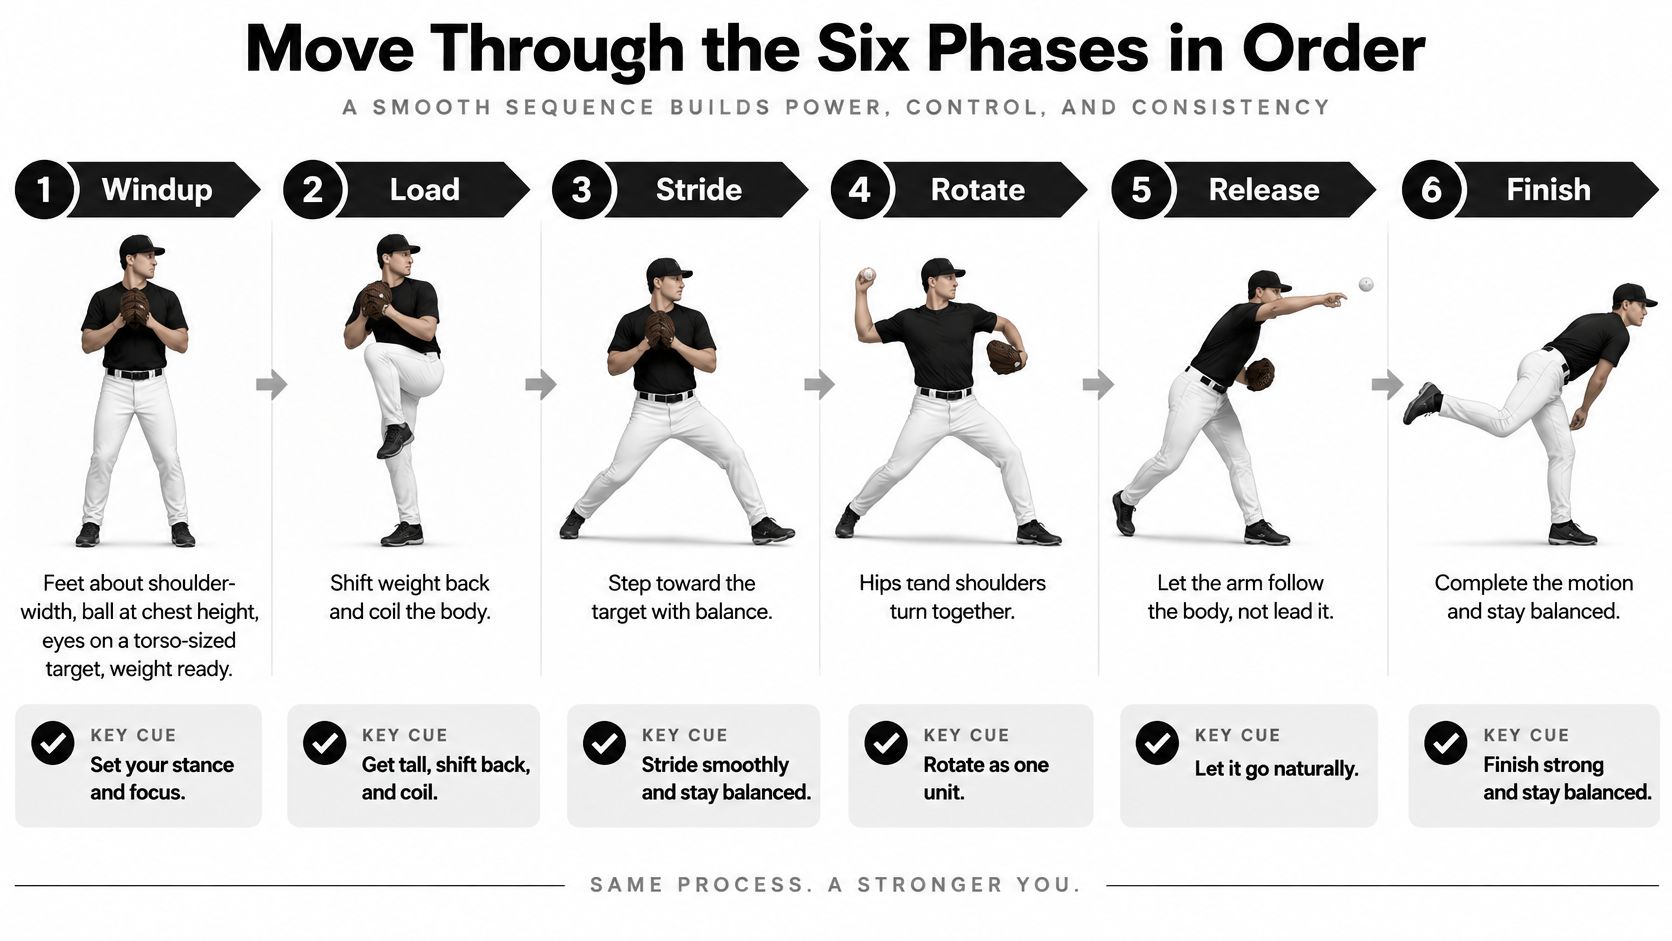
Build the throw without rushing it
Windup. Begin with feet comfortably apart, the ball near the chest, and eyes on a torso-sized target. The child should look ready to move, not rigid. Cue: Get balanced and find your partner. Check: If they sway or fall before stepping, simplify the setup.
Stride. Step toward the target with the foot opposite the throwing hand. A right-handed child steps with the left foot. Keep this a controlled step, not a leap. Cue: Step toward your partner. Check: A step across the body or a hurried hop makes direction harder to repeat.
Arm cocking. As the arm prepares to come forward, the lead foot establishes contact and the body continues turning. The arm can move during the stride; the important distinction is that it shouldn't race into the forward throw before the body is ready. Cue: Land, then let the chest come through. Check: Stop a rehearsal if the chest spins open while the lead foot is still searching for the ground.
Acceleration. The arm comes through after the body has begun contributing. Keep the fingers behind the ball without trying to manufacture a wrist snap. Cue: Let the hand follow the turn. Check: If the child strains or launches upward to reach the target, move closer.
Deceleration. After release, allow the arm to slow through its natural path. Don't ask the child to stop the hand abruptly beside the head. Cue: Let the arm keep moving. Check: A sudden stop or protective recoil needs attention, especially if it hurts.
Follow-through. The throwing hand generally travels across the body while the child finishes over a supported lead leg. The knee can remain softly bent; it doesn't need to lock. Cue: Finish balanced. Check: Falling sideways or collapsing forward suggests the effort or movement needs simplifying.
Make the grip manageable
Place the index and middle fingers across the seams when the child's hand comfortably allows it, with the thumb underneath. Avoid squeezing the ball deep into the palm or stretching small fingers into an adult-sized grip.
For beginners, try a softer ball that feels secure. A slightly larger soft ball can help some children handle the activity, but it shouldn't force the hand wider than is comfortable.
Rehearse without a ball first, then add easy catch at an effort that allows normal conversation. This demonstration can supplement your observation, but don't ask a child to copy every detail of another thrower's motion.
Match Distance and Focus to Age
Youth throwing distances and focus by age
The distances below form an illustrative backyard practice setup, not researched age limits, medical clearance, or game requirements. Start closer whenever the child needs to strain, arc the ball excessively, or abandon the movement to reach a partner.
Age band | Practice distance | Ball | Main focus | Stop and shorten if |
|---|---|---|---|---|
5 to 6 | Begin close enough for an easy direct toss | Softer or slightly larger ball that fits comfortably | Grip, step, chest to target | Feet stay planted; stop completely if throwing hurts |
7 to 8 | Example setup of 20 to 30 ft | Youth baseball | Controlled stride and body contribution before arm acceleration | Forward arm acceleration races ahead of landing |
9 to 10 | Example setup of 35 to 45 ft | Youth baseball | Full sequence; crow hop only after the standing throw is stable | Front side collapses or misses pile up |
11 to 12 | Start at a comfortable infield-catch distance | Standard youth ball | Command at easy effort | Reaching the target requires straining or losing balance |
Choose the distance by the throw
Use the age row as a starting conversation, not a promotion system. A smaller, newer, or less coordinated child may need the closer setup even when teammates stand farther apart.
Say your child fits the middle row but keeps leaning backward to reach you. Walk closer until they can send the ball toward your torso without changing the motion into a heave. That's the useful practice distance today.
Keep the target visible and forgiving. A partner's chest area or a clearly marked square on a throwing net works better than a tiny bull's-eye that makes every attempt feel unsuccessful.
Choose the ball for control. The child should be able to hold and release it without squeezing desperately.
Choose the space for safety. Keep siblings, windows, pets, and other players out of the throwing lane.
Choose the focus for the learner. A beginner may only need step and finish, while a more experienced player can work on landing timing.
Our guide to baseball training for kids provides additional context for keeping skill work appropriate to the child's development.
Earn more room through consistency
Before moving farther apart, look for a run of comfortable sessions with similar direction and balance. Don't increase distance just because a child completed the planned throws.
For example, a child who repeatedly reaches the torso target without straining can try a small step back. If the next throws become rushed or scattered, return to the successful spot rather than asking for more arm.
Leave crow hops for an established standing throw and an outfield-style task. Adding moving feet before the child controls a stationary throw can make it harder to tell which part needs help.
Distance is a reward for timing, not a test of arm strength.
Correct the Mistakes That Steal the Throw
A throw can sail high or wide when the chest opens before the lead foot gives the body a stable base. The ball's flight is a clue, not a diagnosis. Watch the feet and the sequence before deciding that the arm needs a correction.
For a developing player, the goal is coordinated timing. The lower body begins the movement, the trunk turns as the front foot lands, and the arm follows through. Asking a child to twist farther can make the throw harder to repeat. Teach the order, not a bigger motion.
Match the cue to what you can actually see
Throwing mistakes and the cue that fixes them
What you see | Why it breaks | Correction cue |
|---|---|---|
Shoulder starts first | The trunk opens before the lead foot establishes support | Land, then turn the hips, then let the arm through |
All-arm throw | Quiet feet leave the body contributing little to the movement | Step and let the hip pocket begin turning toward the target |
Short, rushed step | The child rushes past lower-body contribution | Take a comfortable step and land softly |
Front knee buckles | The lead leg doesn't provide a stable base | Finish supported over the front leg |
Elbow drops sidearm unexpectedly | The child may be changing the arm path to compensate | Rehearse a comfortable cocking position near shoulder height |
Glove flies open | The upper body may spin before landing | Keep the glove comfortably near the chest as you land |
Every throw is a max effort | Direction becomes harder to repeat and effort obscures the pattern | Use easy effort and score target hits |
These are trial cues, not diagnoses. A naturally lower arm slot isn't automatically a mistake. Never pull a child's elbow upward to match a picture.
A longer stride isn't always better, either. If the step looks rushed and tiny, lengthen it only until the child can land comfortably, without reaching, slipping, or pulling the head away from the target.
Change the earliest problem first
Suppose a video shows the glove flying open, the front knee falling inward, and the ball leaving late. Treat the first visible breakdown, not every detail at once. Ask the child to land softly, then see whether the later parts of the throw become easier to organize.
A simple practice exchange can help: give one cue, let the child rehearse without a ball, then try easy catch. Point out what improved before offering another correction. Children can focus on one clear action more easily than a running list of body parts.
Keep the successful cue. If direction and balance improve, stick with that instruction for a while instead of adding more.
Discard the confusing cue. If the child stiffens or starts arranging body parts, demonstrate the movement in a relaxed way.
Lower the demand. Move closer or rehearse without a ball when the child can't organize the throw comfortably.
Avoid forcing the shoulder backward or pressing the elbow into position. A child learns a throwing pattern by repeating a comfortable movement, not by holding a pose.
For the next practice period, choose one visible mistake from the phone clip and one cue. Consistent language gives the child a clear task: land softly, let the hips begin turning, or keep the glove near the chest. Watch whether the throw becomes easier to repeat, then decide whether that cue is helping.
Warm Up Count Every Throw and Stop on Pain
Start with a short dynamic warm-up before any scored throwing. Move through these activities comfortably, then begin catch close enough that nobody needs to strain.
Easy jogging or skips. Get the whole body moving.
Torso turns. Rotate gently without forcing the lower back.
Walking lunges. Use controlled steps and comfortable depth.
Shoulder circles without a ball. Move through an easy range.
Close catch. Walk apart gradually only while the throws remain comfortable.
Use the checklist as a reminder, not a race against the clock.
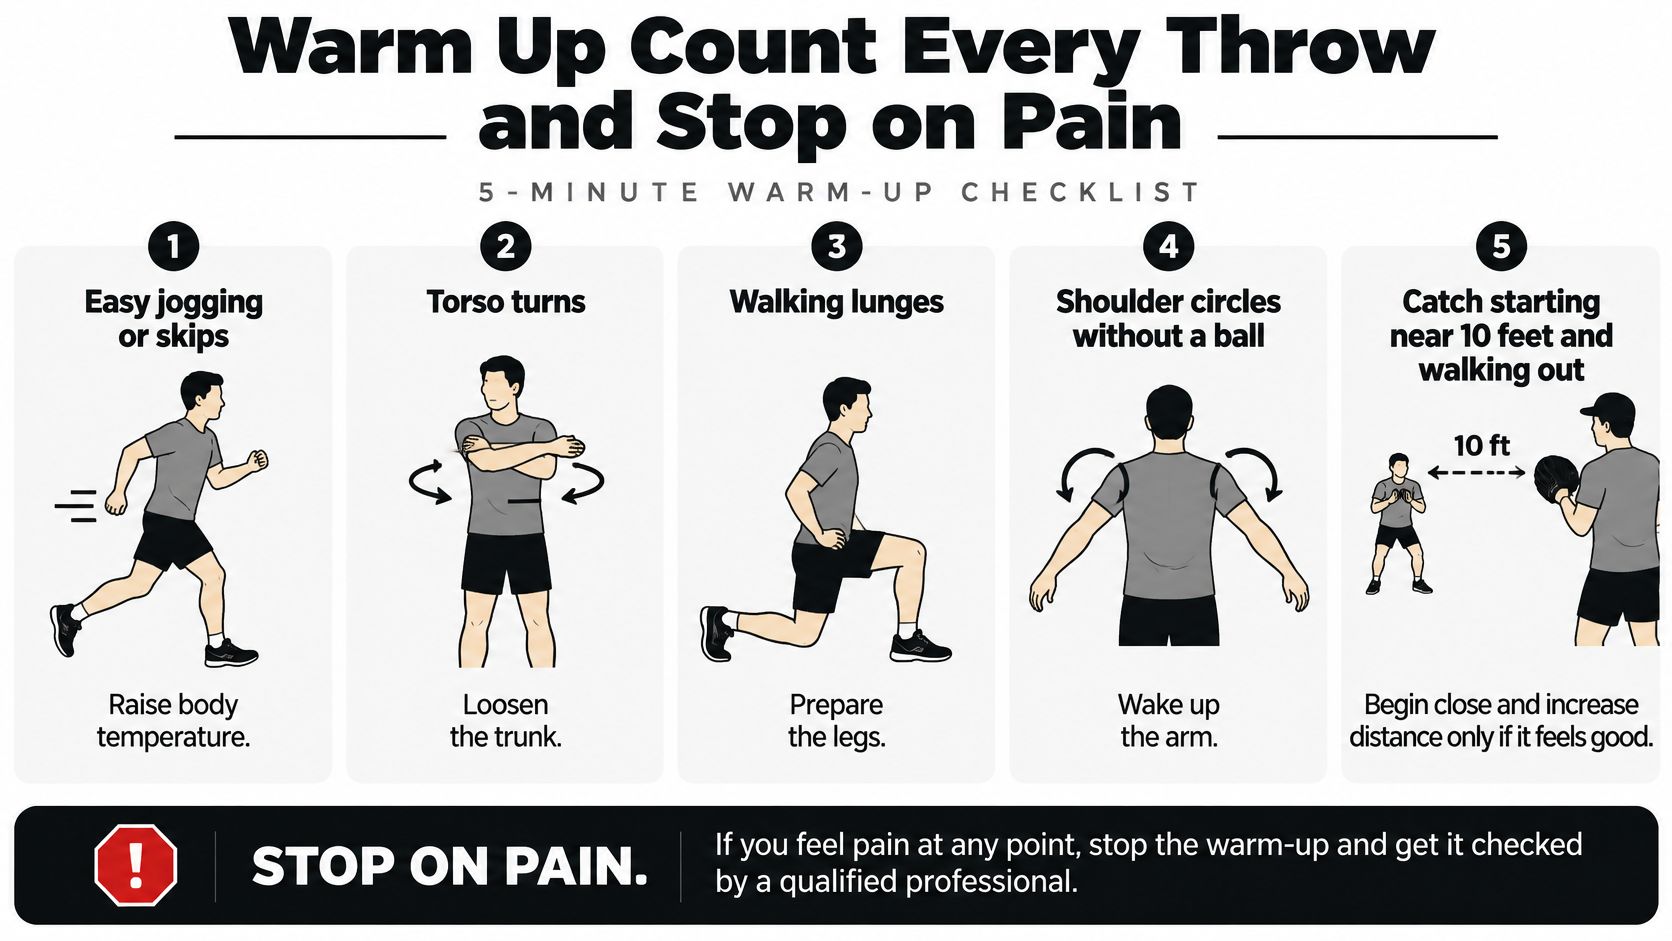
Don't replace movement preparation with a long static stretch. Save comfortable held stretches for afterward if they're part of the child's routine, and never force a painful stretch.
Parents joining the activity may find MEDISTIK's warm-up guidance for active adults useful for their own preparation. Adult guidance isn't a child-specific throwing prescription.
Count the throwing that doesn't appear in the scorebook
The review of youth throwing workload summarizes a study of 11-year-old players that recorded 2,748 pitches but 13,429 total throws, showing how much activity official pitching totals can miss. Warm-up catch, fielding practice, bullpen work, and casual throws all belong in the family's workload picture.
Keep a simple phone note of throwing activity, effort, discomfort, and whether the child looked fresh or tired. Share relevant information between school, league, and private coaches rather than assuming each sees the whole schedule.
Use movement quality alongside the tally
Pain isn't a cue to improve technique and try again. Pain means stop throwing. Persistent pain, next-morning elbow or shoulder discomfort, or recurring symptoms call for assessment by a qualified healthcare professional.
When there's no pain but the child begins rotating early, collapsing, or scattering throws, pause. Reduce the distance or effort; if the pattern doesn't return comfortably, end the throwing work.
Ordinary whole-body tiredness is different from localized joint pain, but don't make the child prove they can push through either. Ask where they feel it and what it feels like.
Session rule: If the sequence stays broken after you simplify the task, the throwing session is over even if the count looks low.
A systematic review of interval-throwing programs found substantial variation and limited formal validation, so there's no single universal throwing-load formula to apply confidently to every child. A tally helps, but it doesn't replace attention to symptoms, recovery, and movement.
Use our sports injury prevention guidance to support broader preparation habits. Don't use this home practice plan as rehabilitation or clearance to return after an injury.
Run a Twenty Minute Throwing Practice
Twenty-minute throwing practice by minute
Treat this as an illustrative session, not a required workload. A child who needs a longer warm-up gets it, and a child who loses comfortable movement finishes early.
Minutes | Work | Target |
|---|---|---|
1 to 4 | Begin the dynamic warm-up | No scored throws; extend preparation if needed |
5 to 8 | No-ball reps with a weight shift, stride, landing, hip turn, and slow arm path | Smooth order and a supported finish |
9 to 16 | Partner or net throws at the chosen comfortable distance | Repeatable torso-target throws at easy effort |
17 to 20 | Easier, shorter catch if the child remains comfortable | Finish with controlled movement, not fatigue |
Don't squeeze extra throws into a timed block. Allow time to retrieve the ball, reset the grip, and listen to the child.
This is the kind of simple, coach-guided setup that keeps the activity focused.
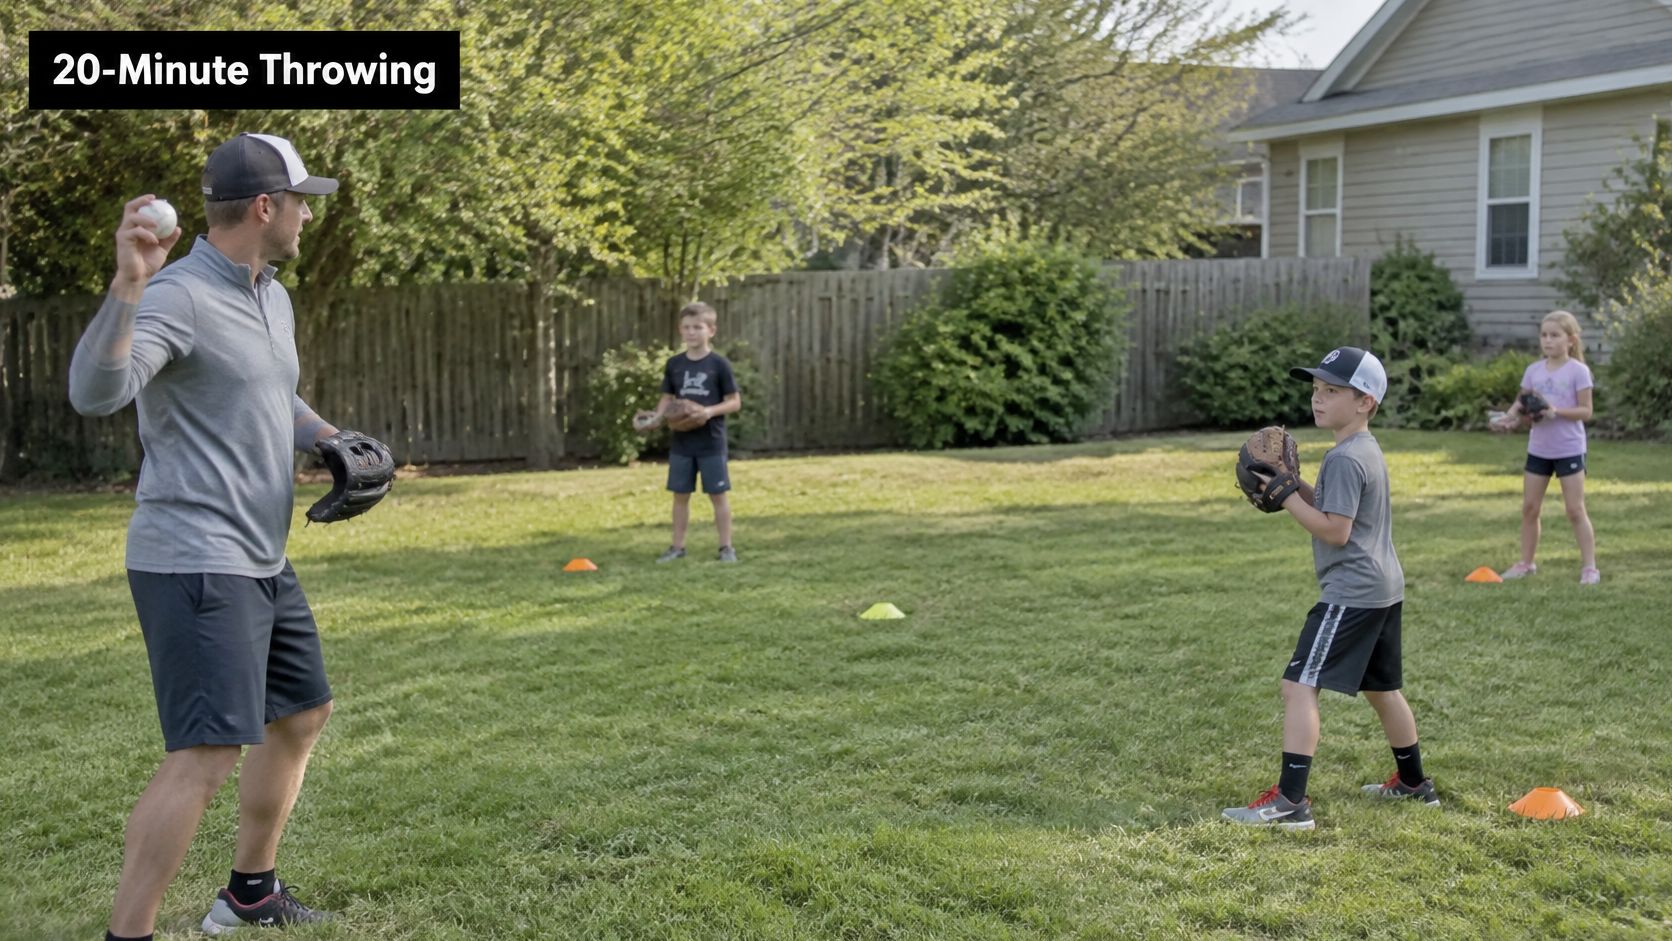
Use a small drill menu
Footwork without a ball comes first. Have the child rock gently, step, land, turn, and finish. Briefly hold the finish so they can notice whether they're supported over the lead leg, without locking the knee.
For target toss, mark a torso-sized area on a suitable throwing net or use a ready partner's torso area. Count a hit when the ball reaches that area without requiring the partner to chase it.
Try a single-step throw only when the stationary setup is comfortable and accurate. The step should help the child flow toward the target, not create a bigger run-up or harder throw.
Keep score without a radar gun
For example, record hits out of ten during a short target game, with eight successful throws as a possible coaching checkpoint before trying a modest progression. That's a practice-game rule, not a validated readiness threshold or permission to continue when tired.
Also note the miss pattern. A group of throws just beside the target gives different feedback from balls scattered high, low, and behind the partner.
The motion-capture study of professional pitchers found no significant velocity difference between its high- and low-accuracy groups, whose average velocities were 38.0 and 38.5 m/s, respectively; the less accurate group also showed greater arm-loading measures. That doesn't establish a youth target, but it reinforces why speed and command deserve separate attention.
Record the result. Note hits and the general direction of misses.
Record the conditions. Keep track of the target, distance, and easy effort used.
Progress cautiously. Look for stable results across comfortable sessions before adding distance.
Skip throwing on a pain day. Ending early with a child who still wants to play is better than completing the clock with deteriorating movement.
Decide When a Private Coach Should Take Over
Keep the home routine when your child throws comfortably, establishes lead-foot support before forward arm acceleration, and reaches the target consistently at an appropriate distance. They don't need a private lesson just because another child throws farther.
Separate a coaching problem from a medical concern. A recurring timing mistake can benefit from instruction; pain that persists after practice or returns the next morning needs a qualified healthcare professional, not a harder drill.
Know which help to choose
Continue at home when the child understands the cue, enjoys the work, and shows comfortable progress.
Book a coach when the same miss persists despite simpler tasks, or before adding pitching demands.
Seek medical assessment for ongoing elbow or shoulder pain, protective movement, or symptoms that repeatedly interrupt throwing.
A private session should address a specific pattern, such as opening the chest too early or losing the finish. It shouldn't be a promise to make the child throw harder.
For Humble, Kingwood, and Atascocita families, our one-on-one coaching sessions offer a local next step. At JC Sports Houston, our experienced teachers are trained in our curriculum, which places the child at the center of the game and develops motor skills, self-confidence, and sports technique through interactive games and drills.
We provide equipment and curriculum materials. New families may request a free trial to observe how instructions fit their child's needs.
Bring a short video and describe the cue you've tried. If throwing is pain-free, film a handful of throws, choose the clearest correction, and try the short routine on separate days this week; get another set of eyes on the child if the same difficulty remains.
JC Sports Houston offers youth baseball, soccer, basketball, private sessions, and seasonal leagues built around developing children's skills. Visit JC Sports Houston to explore baseball instruction or request a free trial, and help your child build a comfortable, repeatable throw before chasing speed.
Comments